For many professionals, fielding 20 business calls in a day is a breeze. But if only one of those phone calls is actually meant for you, you may spend more time routing calls than actually helping customers. Justifying these “small” interruptions can become a big efficiency issue as your call volume grows.
The answer: Automating your call routing with a phone menu.
In this guide, we explain how you can set up a phone menu to route incoming calls without needing a receptionist. We also describe different types of calling menu options and explain how you can avoid mistakes before they happen.
Looking for a business phone platform to get up and running fast? We also walk through the step-by-step process of setting up a phone menu with OpenPhone.
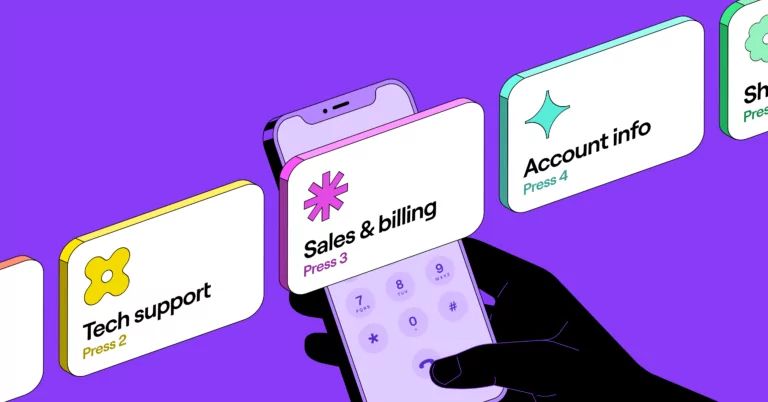
A phone menu, also known as IVR, is a pre-recorded greeting that enables callers to route their own calls and get the information they need using key presses to indicate who they want to reach. When someone calls a phone number with a phone menu, they’ll hear a list of menu options, such as “press one for our business hours” or “dial two for live support.”

Phone menus automatically route callers in the right direction as soon as they select an option with their keypad — whether it’s to another phone number, a voice recording, or your voicemail box. Your business can configure exactly what occurs with each option.
Ready to create a more effective incoming call system for your team?
Here’s the step-by-step process you can use to set up a phone menu for your business.
1. Select the business phone number you wish to add a phone menu to
You should set up a phone menu on the main customer-facing numbers clients are most likely to call. These include:
- Customer service lines
- Business departments (like Finance or Sales)
- Toll-free numbers
If you are looking to move your business phone number to another provider so you have more options to set up call routing, check our guide to the best auto-attendant phone systems.
2. Map out your call flow
You can think of your call flow as a map callers can use to find the right destination within your business. After they hear a recorded greeting and decide which option they need, they can press (or speak) a number (or word) to route themselves to the right place.
You can easily customize your call flow to accommodate each of your team members or departments. That said, you shouldn’t create complexity where it doesn’t need to be. You should be clear about where each key press directs callers and explain what happens if they stay on the line without selecting an option.
You may want to put your most popular menu options first on the recording (like ‘press one to speak with a representative’). If you’re not sure what your customers need most, consider collecting information from incoming calls and streamlining your call flow into a few specific options. Collecting this information may also spark opportunities to playback a call recording based on a specific option that answers a frequently asked question so callers find what they need to know without having to speak to anyone on your team.
3. Add menu options in your business phone system
Now that you have a road map for your callers, it’s time to implement your menu options and help callers get where they need to go.
You have two major options:
- Interactive voice response (IVR): Callers can say a specific word to reach the right team, person, or piece of information.
- Dial by number: Callers key in a number on their phone to reach a specific team, person, or piece of information.
With OpenPhone, you can easily build phone menus with both dial by number and IVR options. This is a great way to ensure accessibility for your callers without limiting your options as your phone menu grows.
4. Add your phone menu greeting
Your callers probably don’t want to waste any unnecessary time on the phone — which is why they want to know what to expect the minute they call your business. For this reason, you need to build a phone menu with a clear recorded greeting so you can quickly guide customers to the right place.
Your phone menu script should contain:
- Your business name and hours
- Your phone menu options
- Your default calling route (what happens if customers don’t select an option)
- Other places where customers can get support
Here’s an example of what this could look like for your business:
“Thanks for calling [company] in [location]. To reach the [example] department, press one. For [department], press two. For [department], press three. For all other questions, simply stay on the line to speak with our customer service team. You can also reach us by emailing [email address].”
Copy to Clipboard
Want more inspiration before getting started? Check out our guide to phone menu scripts.
5. Add or tweak any other phone settings
You may have your phone menu up and running, but you could make it even better by refining a few details.
You should make a point of configuring settings like:
- Your business hours. You can define your business hours in your automated phone system so you only accept calls within that time frame. Any calls received outside that time frame are sent to your away voicemail, where you can let them know you plan to get back to them soon. Speaking of voicemail. . .
- You should set up voicemail and away voicemail greetings for the phone numbers your menu routes to. With OpenPhone, you can easily configure a custom voicemail and upload a file from your admin dashboard.
- You may want to enable automatic call recordings for later reference or training purposes. That way, you always have a record of past conversations and can help new team members onboard more effectively.
It’s a good idea to add auto-replies along with your phone menu in case someone calls and doesn’t leave a voicemail. For example, if callers reach out largely to book appointments with your business, you can automatically send a message with a link to your calendar. That way, customers can book themselves without waiting on a callback.
Whether you want to manage a growing call volume or look more professional to customers, there are all sorts of ways to use phone menus to your advantage.
Let’s take a look at the various locations where your phone menu can forward inbound callers.
Routing to a team or person associated with the phone number
You may want to direct callers to individual business phone numbers so all relevant conversations happen in the right place. Your call script could say something along the lines of, ‘To reach [name], press one.’ If you’d prefer team members to stay anonymous or are routing calls to a shared number for your team, you can say something like, ‘Press one for sales.’
Forwarding to another number
Want to forward calls from a business number to your personal cell? You can create a phone menu option to do just that.
Just keep in mind you can use a business phone solution like OpenPhone to make and receive business calls on your personal devices. Since you can use your business number from almost anywhere with a WiFi connection, you can take your customers (and calls) wherever you go — all without intermingling your personal and professional life.
Letting the call through
If customers don’t select an option on your phone menu, you can automatically let them through to your ‘catch all’ destination (such as the customer service team). Just don’t forget to let callers know that’s what happens if they don’t select a destination. You may want to add a disclaimer to your call script that says, “For all other questions, please stay on the line.”
Sending to voicemail
If you’re not looking to prioritize calls or prefer that your team follows up regarding specific inquiries later, you can set up a phone menu option that directs callers straight to your voicemail. .
Playing back a recording
Instead of sending callers to a specific department or team member, you can play back a recording when they press (or say) a specific number.
Imagine one of your customers wants information about your business locations. To save time and effort, you can create a phone menu option that reads your addresses and hours automatically.
You’re welcome to customize this script to your liking:
“For our [location] location at [address], we’re open from [schedule] Monday through Saturday. Our [location] location at [address] is open from [schedule] Monday through Saturday.”
Copy to Clipboard
Setting default options
A caller may not choose any of the options in your phone menu. In this case, your business needs to decide on a default phone menu option — which is the place callers are directed if they don’t select a specific option.
Examples of default options include:
- Replaying the options
- Letting them through to a specific number
- Playing a farewell message and ending the call
Building a great phone menu isn’t rocket science, but it’s possible to overlook certain things that could make your menu even more efficient.
Here’s why and how businesses fumble with their menu design — and how you can avoid the pitfalls during the design phase.
Not including IVR menu options
You have two options for setting up a phone menu: auto-attendants (key presses) or IVR (voice commands). It’s certainly possible to use just an auto-attendant for your phone menu, but doing so isn’t the best way to build a call flow. Auto-attendants alone may prevent callers from contacting your business more effectively and may even create barriers for persons with disabilities.
If you’re an OpenPhone customer, you can access IVR and auto-attendant tools with a Business plan. You’re welcome to scroll down in the guide to learn more about how to set this up.
Not setting what happens if a caller doesn’t select a phone menu option
Have you ever lost track of the options on a phone menu because the recorded greeting didn’t play on repeat? This is exactly what you don’t want customers to experience, especially if none of the phone menu options meet their needs.
Like we discussed earlier, you need to set up a default phone menu option to easily route callers who don’t select a forwarding location. This could mean letting them through to your customer service department or repeating the greeting so they can reevaluate their options.
Having a wordy or difficult-to-follow phone menu greeting
You want your phone menu to be friendly and accessible, not frustrating or confusing. To do this, you need to use clear phrasing and avoid jargon so you don’t accidentally alienate your audience.
The quickest way to check your greeting for jumbled language or technical terms is to read the script out loud to yourself. Does it sound like something a person would say? Is it stiff, awkward, or confusing? Just iterate and adjust as necessary.
Not testing your phone menu after setting it up
You need to test your phone menu thoroughly before making it available to callers. Thankfully, this doesn’t have to be hard to do — you just need a cell phone and your business number.
Be sure to press (or say) each of your key phrases to make sure they direct callers wherever they’re supposed to go. You may also want to listen to the call script itself to see if anything sounds awkward, wordy, or confusing.
Not iterating on the phone menu design
It’s one thing to build a phone menu for your business, but another to see if it actually works for your callers. That’s why it’s a good idea to test your phone menu design so you can measure, adjust, and iterate to make it better.
Keep in mind this doesn’t require you to make drastic changes all at once. Maybe you start with adjusting the greeting script or want to work on changing the order of your menu options. Either way, be sure to check your call analytics so you can see which departments get the most traffic and when.
Not using shared numbers to ensure your team doesn’t miss important calls
Few things are worse than calling a phone menu only to reach someone’s voicemail inbox. And for busy teams receiving hundreds of calls per day, it just creates another risk of a conversation falling through the cracks.
Setting up a shared number is a great way to split responsibility for incoming calls without hiring more team members or contracting third parties. With OpenPhone, you can add different team members to the same phone number so everyone can make and receive calls from the same number. Since a shared number notifies all members when a call comes through, you just need a single option on your phone menu to ensure there’s always someone around to pick up the phone.
Choosing a VoIP system that supports automated attendants is one of the simplest ways to set up a phone menu. Within minutes, you can have a professional menu set up without any IT support.
OpenPhone includes basic auto-attendant functionality with all pricing plans — and by upgrading to our Business plan, you get even more advanced auto-attendant features.
Just follow these steps to set up a phone menu with OpenPhone.
1. Sign up for an OpenPhone account
If you don’t already have an OpenPhone account, you can sign up for a free seven-day trial to put our platform to the test.
Do you already have an existing US, Canadian, or North American toll-free number? Once you confirm OpenPhone is a great fit, you can port the number over for free.
2. Select a phone number you wish to add a phone menu to
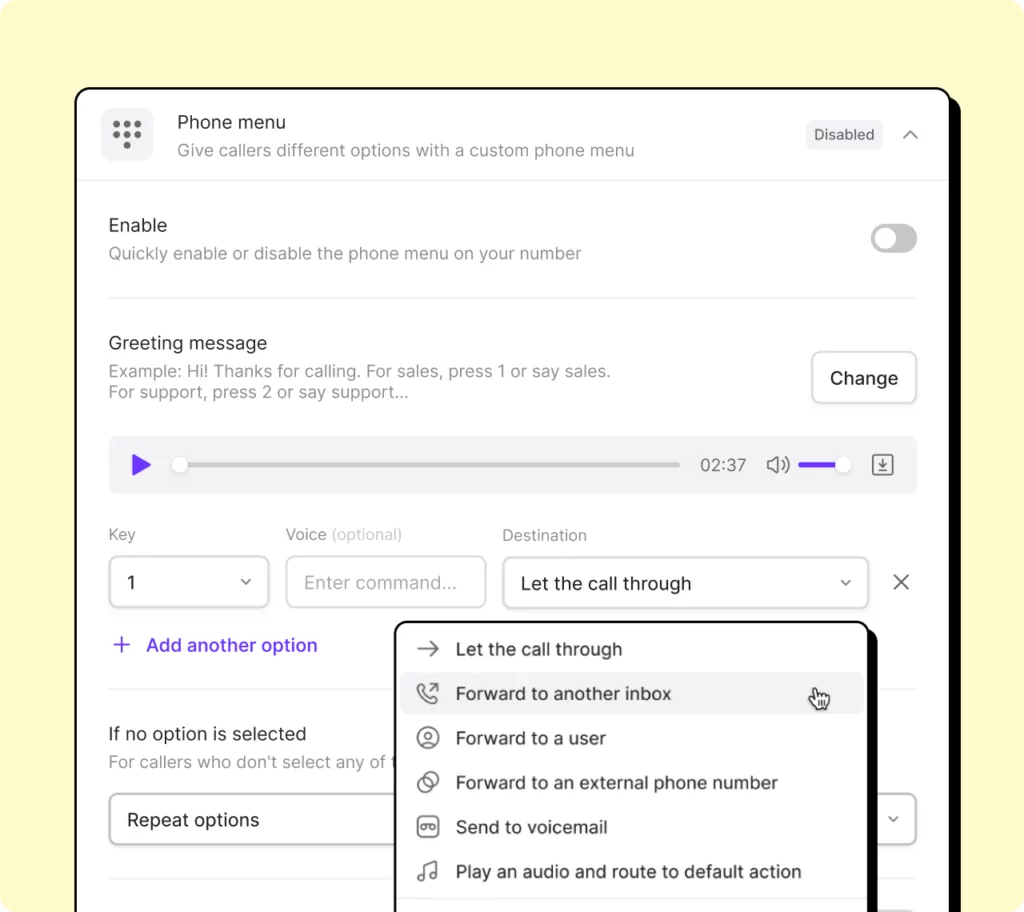
Head to the “Phone numbers” section of your workspace settings, then choose the business phone number you want to add a phone menu to. Next, scroll down to the “Phone menu” section and click “Disabled” to open up the Phone Menu panel and start setting up your menu.
3. Set up a greeting message

Your greeting message is the first thing your customers hear when they dial your phone number . Think of it as an introduction that plays before your call menu options. Your auto-attendant script can be as simple as, “Thanks for calling XYZ Company! Please select from the following options to reach the right department.”
All you have to do is tap “Set a greeting message” to upload an audio file, record a message, or type out a message to generate an automated voice recording.
4. Set destinations for each phone menu option
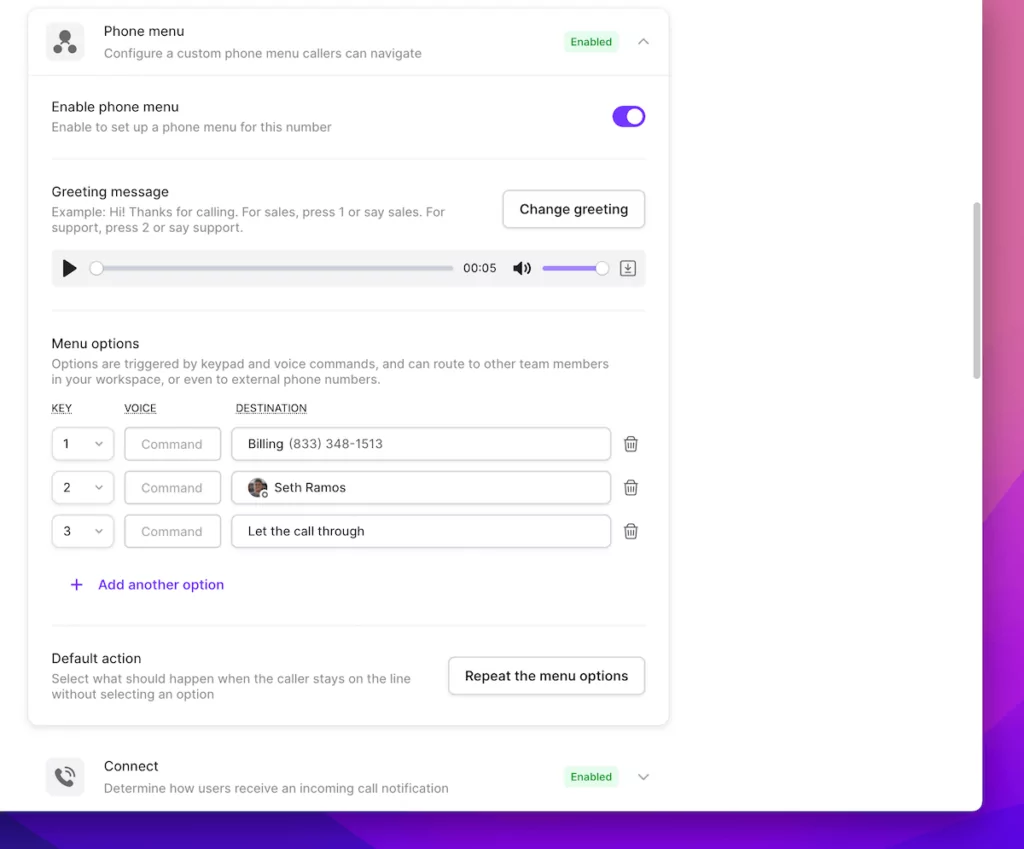
Under Menu Options, you can set where you want to route callers to based on their keypad or voice command. From there you can:
- Forward calls to another OpenPhone number
- Forward calls to a US or Canadian number outside your organization
- Let calls go through to the number callers originally dialed
- Send callers to voicemail
- Send callers to a specific team member (even if they share a phone number)
- an audio message for a dedicated phone menu option
5. Set what happens if callers don’t select a menu option
In addition to setting destinations for your menu options, you can also set a destination for callers who don’t type or say any command. Under “If no option is selected,” you can choose from the three standard destinations listed in Step Four — or, if you’re a Business user, you can choose from any of the six destinations in Step Four. Business users can also set their auto-attendant to repeat all menu options to the caller.
Tap “Save” once you’re done customizing your phone menu, and you’re all set.
You can set up a phone menu in 15 minutes or less by starting your free trial of OpenPhone today.

Setting up a phone menu can help you impress and support your customers while keeping your team as productive as can be. With a virtual phone system, you can create your phone menu in a matter of minutes and route your callers to a variety of destinations.
But the perks of VoIP systems don’t stop with a phone menu. With OpenPhone, you can continue supporting callers and helping your team succeed with free calling in the US and Canada. You can also access features like call recording, voicemail transcriptions, VoIP call forwarding, and integrations with business apps like HubSpot CRM and Slack, with small business-friendly pricing.
Ready to see why OpenPhone remains the #1 business phone solution on G2? Start your free trial of OpenPhone now to set up your first business phone menu.
